Links
AI / Agents
Developers
Community
Full license MIT
Meta
Requires: Python >=3.10
Provides-Extra: dev
Package Info
Umami Analytics Client for Python


![]()
![]()
📚 Documentation: mkennedy.codes/docs/umami-python
Client for privacy-preserving, open source Umami analytics platform based on httpx2 and pydantic.
umami-analytics is intended for adding custom data to your Umami instance (self-hosted or SaaS). Many umami events can be supplied directly from HTML via their data-* attributes. However, some cannot. For example, if you have an event that is triggered in your app but doesn’t have a clear HTML action you can add custom events. These will appear at the bottom of your Umami analytics page for a website.
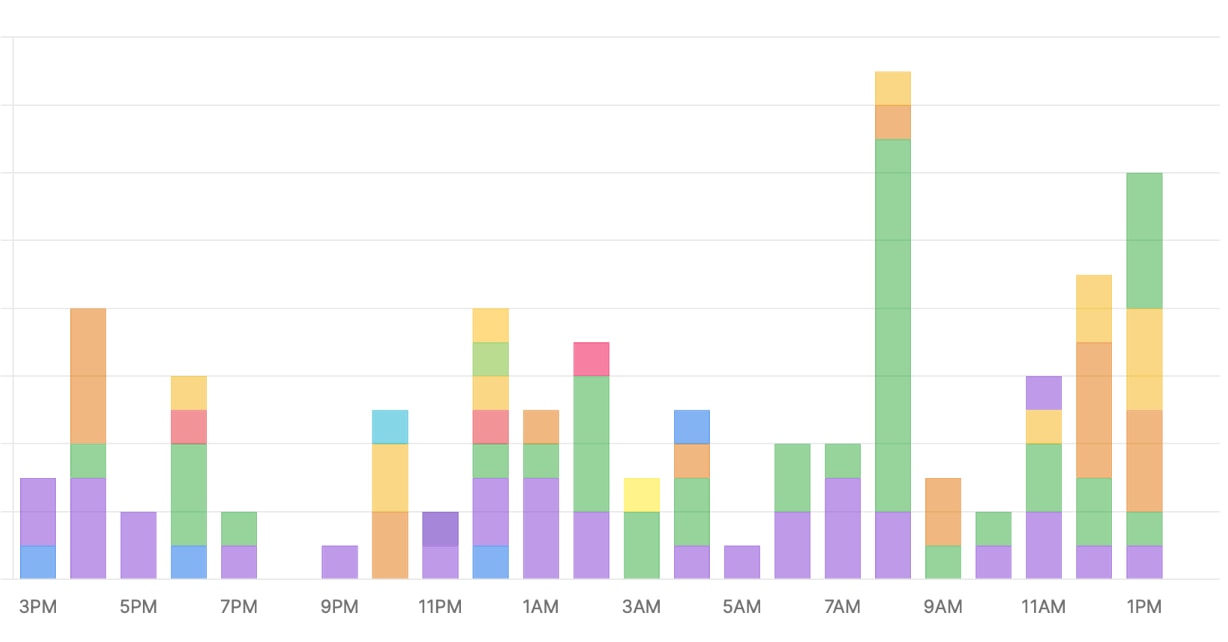
One example is a purchase-course event that happens deep inside the Python code rather than in HTML at Talk Python Training. This is what our events section looks like for a typical weekend day (US Pacific Time):
Focused on what you need, not what is offered
The Umami API is extensive and much of that is intended for their frontend code to be able to function. You probably don’t want or need that. umami-analytics only covers the subset that most developers will need for common SaaS actions such as adding custom events. That said, PRs are welcome.
Core Features
- ➕ Add a custom event to your Umami analytics dashboard.
- 💰 Track revenue with dedicated revenue event support.
- 📄 Add a page view to your Umami analytics dashboard.
- 🆔 Attach a per-user
distinct_idto events, page views, and revenue (sent as the Umami payloadid). - 🌐 List all websites with details that you have registered at Umami.
- 📊 Get website statistics including page views, visitors, visits, and bounce counts.
- 👥 Get active users count for real-time monitoring.
- 💓 Heartbeat check to verify Umami server connectivity.
- 🔀 Both sync and async programming models.
- ⚒️ Structured data with Pydantic models for API responses.
- 👩💻 Login / authenticate for either a self-hosted or SaaS hosted instance of Umami.
- ☁️ Authenticate against Umami Cloud with an API key via set_cloud_api_key() — no login() needed.
- 🥇Set a default website for a simplified API going forward.
- 🔧 Enable/disable tracking for development and testing environments.
Development and Testing Support
🔧 Disable tracking in development: Use umami.disable() to disable all event and page view tracking without changing your code. Perfect for development and testing environments where you don’t want to pollute your analytics with test data.
import umami

# Configure as usual
umami.set_url_base("https://umami.hostedbyyouorthem.com")
umami.set_website_id('cc726914-8e68-4d1a-4be0-af4ca8933456')
umami.set_hostname('somedomain.com')

# Disable tracking for development/testing
umami.disable()

# These calls will return immediately without sending data to Umami
umami.new_event('test-event')  # No HTTP request made
umami.new_page_view('Test Page', '/test')  # No HTTP request made

# Re-enable when needed (default state is enabled)
umami.enable()
When tracking is disabled:
- ✅ No HTTP requests are made to your Umami server
- ✅ API calls still validate parameters (helps catch configuration issues)
- ✅ All other functions work normally (login, websites, stats, etc.)
- ✅ Functions return appropriate values for compatibility
See the usage example below for the Python API around these features.
Async or sync API? You choose
🔀 Async is supported but not required for your Python code. For functions that access the network, there is a func() and func_async() variant that works with Python’s async and await.
Installation
Just uv pip install umami-analytics
📚 Documentation
Full documentation lives at mkennedy.codes/docs/umami-python. It covers installation, configuration, the complete API reference — every public function with its sync and async twin — plus Umami Cloud setup and runnable examples.
The quick tour below gets you started; the docs site is the complete, searchable reference. There’s also an llms.txt if you’d like to point an AI assistant at the library.
Usage
import umami

umami.set_url_base("https://umami.hostedbyyouorthem.com")

# Auth is NOT required to send events, but is for other features.
login = umami.login(username, password)

# Skip the need to pass the target website in subsequent calls.
umami.set_website_id('cc726914-8e68-4d1a-4be0-af4ca8933456')
umami.set_hostname('somedomain.com')

# Optional: Disable tracking for development/testing
# umami.disable()  # Uncomment to disable tracking

# List your websites
websites = umami.websites()

# Create a new event in the events section of the dashboards.
event_resp = umami.new_event(
    website_id='a7cd-5d1a-2b33', # Only send if overriding default above
    event_name='Umami-Test',
    title='Umami-Test', # Defaults to event_name if omitted.
    hostname='somedomain.com', # Only send if overriding default above.
    url='/users/actions',
    custom_data={'client': 'umami-tester-v1'},
    distinct_id='user-123',  # OPTIONAL: stable per-user id, sent as payload id
    referrer='https://some_url')

# Create a new page view in the pages section of the dashboards.
page_view_resp = umami.new_page_view(
    website_id='a7cd-5d1a-2b33', # Only send if overriding default above
    page_title='Umami-Test', # Required: the page title to record.
    hostname='somedomain.com', # Only send if overriding default above.
    url='/users/actions',
    distinct_id='user-123',  # OPTIONAL: stable per-user id, sent as payload id
    referrer='https://some_url')

# Track revenue for a transaction
revenue_resp = umami.new_revenue_event(
    revenue=19.99,  # Monetary amount (required)
    currency='USD',  # ISO 4217 currency code, defaults to 'USD'
    event_name='checkout-cart',  # Defaults to 'revenue' if omitted
    url='/checkout',
    distinct_id='user-123',  # OPTIONAL: stable per-user id, sent as payload id
    custom_data={'product': 'widget', 'quantity': 2})

# Get website statistics for a date range
from datetime import datetime, timedelta

end_date = datetime.now()
start_date = end_date - timedelta(days=7)  # Last 7 days

stats = umami.website_stats(
    start_at=start_date,
    end_at=end_date,
    website_id='a7cd-5d1a-2b33'  # Only send if overriding default above
)
print(f"Page views: {stats.pageviews}")
print(f"Unique visitors: {stats.visitors}")
print(f"Bounces: {stats.bounces}")

# Get current active users count
active_count = umami.active_users(
    website_id='a7cd-5d1a-2b33'  # Only send if overriding default above
)
print(f"Currently active users: {active_count}")

# Check if Umami server is accessible
server_ok = umami.heartbeat()
print(f"Umami server is {'accessible' if server_ok else 'not accessible'}")

# Call after logging in to make sure the auth token is still valid.
umami.verify_token()
This code listing is very-very high fidelity pseudo code. If you want an actually executable example, see the example client in the repo.
Umami Cloud
Using Umami Cloud instead of a self-hosted instance? Authenticate with an API key rather than login(). Create one in Umami Cloud under Settings → API keys.
In Cloud mode you do not call set_url_base() or login() — set_cloud_api_key() takes care of both the host routing and the authentication header for you:
import umami
from datetime import datetime, timedelta

# Authenticate with your Cloud API key. region is optional ('us' or 'eu');
# omit it to use the region of the account that owns the key.
umami.set_cloud_api_key("your-cloud-api-key", region="eu")
umami.set_website_id("your-website-id")

# Data/management calls go to https://api.umami.is/v1[/region]/...
# and send the x-umami-api-key header automatically.
active_count = umami.active_users()

end = datetime.now()
stats = umami.website_stats(start_at=end - timedelta(days=7), end_at=end)
print(f"Visitors (last 7 days): {stats.visitors}")

# Events are sent to https://cloud.umami.is/api/send automatically.
umami.new_event(event_name="purchase", url="/checkout", hostname="example.com")

# Return to self-hosted / token behavior at any time:
# umami.clear_cloud_api_key()
Routing is handled for you: data and management calls go to
https://api.umami.is/v1(authenticated with thex-umami-api-keyheader), while events are sent tohttps://cloud.umami.is/api/send. Note that the Umami Cloud API is rate-limited to 50 calls / 15 seconds.
The self-hosted (login()) usage shown above is unchanged — Cloud mode is simply a labeled alternative, and existing code keeps working exactly as before.
Want to contribute?
See the API documentation for the remaining endpoints to be added. PRs are welcome. But please open an issue first to see if the proposed feature fits with the direction of this library.
Enjoy.