
[IMAGE NO LONGER AVAILABLE]
As an instructor at DevelopMentor [defunct link: http://www.develop.com], I have the unique opportunity to watch many developers experience ASP.NET MVC for the first time. This typically goes through several stages:
- Extreme Interest (the web is exciting again!)
- Confusion (where does the view go again? wait, what’s routing?)
- Shock (you have got to be kidding, foreach in the html file?)
- Loss (surely there are some drag-and-drop controls, right… right?)
- Acceptance (OK, I will learn HTML and CSS after 10 years of working on the web)
- Joy and Freedom (How could I have ever used webforms?)
I rarely hear developers who’ve adopted MVC returning to webforms voluntarily. But not everyone makes it to level 6 of MVC enlightenment. So here is an article to help the new comers make it across step 2 more easily as well as help the advanced MVC developers be more productive.
MVC subscribes to the philosophy of convention over configuration. This both makes MVC easier to use but also more confusing to beginners. For example, given an action method in a controller (say the Hello method in the Home controller) your view must be placed in the Views/Home/ folder and named Hello.cshtml. Luckily in the case of views, Visual Studio has the tooling built in to make this brain-dead.
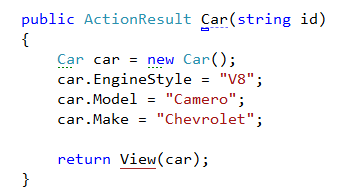
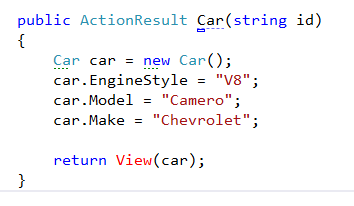
Consider this action method:
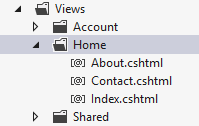
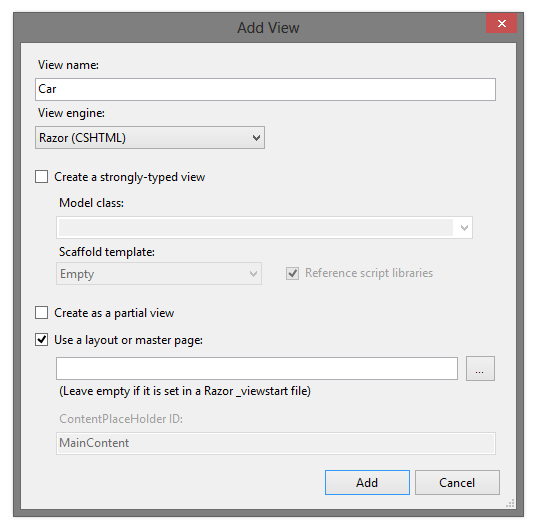
First, you could do it the somewhat painful, manual way. Create the views sub-folders (Home), then right-click and choose “Add new item > View”:
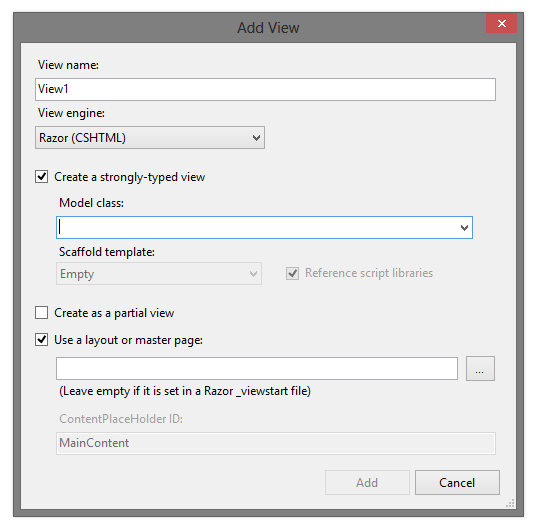
And you get this dialog. You then have to fill it out correctly. Make sure you call the view Car and make it strongly-typed to the Car class. It is not initialized for you.
Creating Views via Action Methods
But there is a faster and better way. Make sure your app is compiled. Then right-click inside the action method and choose add view.
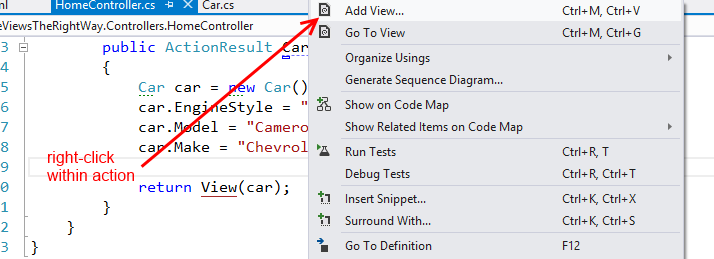
Now the wizard that comes up has the name of the view auto-filled by Visual Studio. Nice! It will also create any needed View subfolders and place the file in the correct one.
Creating Views via Resharper
Now, if you have Resharper installed, there are still better ways. First, the view will be red when it is missing. Here’s that same action with Resharper enabled.
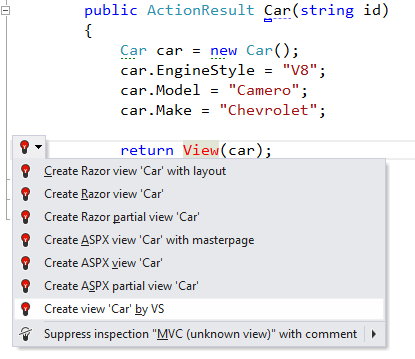
Placing the cursor on the view line gives you the red-light fix-it symbol. Hit ALT-ENTER to get the Resharper options.
Choose the bottom option, “Create view ‘Car’ by VS”. This will bring up the dialog fully populated correctly:
Resharper populates the Add view dialog (make take a sec):
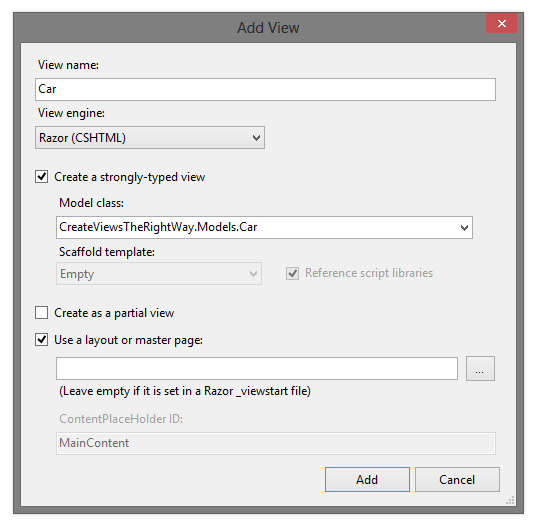
Hit enter and you’re all set! That’s the easiest way.
Resharper also has goodness for partial views. See the Car_ShowSummary is red below because it doesn’t exist.
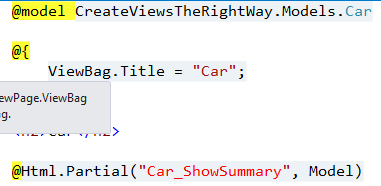
Choosing the same Resharper option, gives you a partial view populated perfectly (make sure you pass the model).
[IMAGE NO LONGER AVAILABLE]
Now you see how easy adding views to MVC projects can be. No need to remember the naming conventions or where exactly to place them. Visual Studio and Resharper handle it all for you.
Cheers,
@mkennedy